7 Best Ways to Replace a Heavy Duty Lift Vacuum Pump?

Time:2026-09-15 Author:Liam
0%

Replacing a heavy-duty lift vacuum pump is not simply a matter of removing bolts and fitting a new unit. The pump controls lifting force, cycle speed, noise, and operational safety. A small leak around a hose, seal, or filter can reduce holding performance within seconds. This is why technicians should inspect the complete vacuum circuit before ordering a replacement.

The question is direct: How to replace the vacuum pump in a heavy-duty lift? The answer requires practical testing, manufacturer specifications, and careful risk control. The U.S. Department of Energy’s industrial efficiency guidance highlights leakage control, correct system sizing, and preventive maintenance as major factors in reducing energy waste. The European Vacuum Society also emphasizes matching pump technology with pressure range, contamination level, and duty cycle. These principles apply strongly to lifting equipment used in workshops, warehouses, and service bays.

This guide presents seven practical replacement methods, including direct pump substitution, upgraded motor selection, improved filtration, and complete vacuum-system refurbishment. Each approach considers flow rate, ultimate vacuum, voltage, mounting dimensions, oil compatibility, and expected lifting frequency. A gauge reading should be recorded before disassembly. The sound matters too. A harsh knocking noise may indicate bearing damage, while slow recovery can suggest leakage rather than pump failure.

Do not trust appearance alone. A clean pump may still be worn internally. It is easy to overlook.

The recommendations follow manufacturer manuals, ISO-based machine-safety thinking, and field-service experience. However, equipment designs vary. One solution may perform well on a mobile lift but fail on a fixed industrial platform. That possibility deserves honest attention. Safety isolation, pressure release, and post-installation load testing remain essential before returning the lift to service.
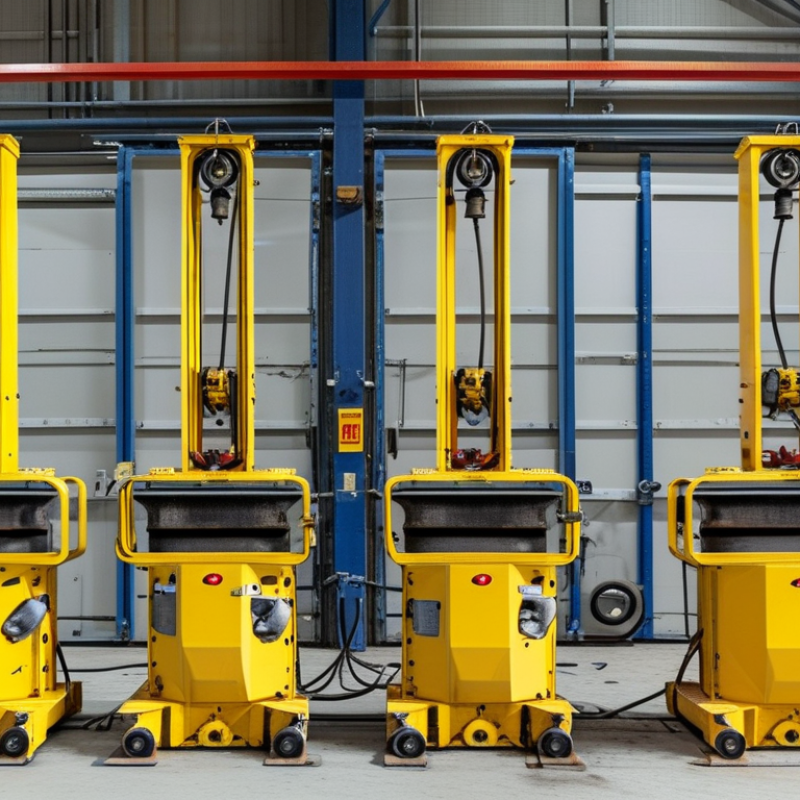
7 Best Ways to Replace a Heavy Duty Lift Vacuum Pump?

Identify the Vacuum Pump Type and Replacement Requirements

Replacing a heavy duty lift vacuum pump starts with identifying the existing pump type. Rotary vane, diaphragm, liquid ring, and dry-running pumps handle different loads. A similar-looking unit may perform poorly.

In field service, technicians usually check seven points before selecting a replacement. Confirm the vacuum level, airflow, motor power, shaft speed, port size, mounting pattern, and duty cycle. Record the pump’s nameplate data and measure the inlet connection with calipers. Check whether the system uses oil, water, or dry operation. Moisture changes the choice.

Some replacements fail quietly. A pump may reach maximum vacuum during a bench test but lose lifting force under continuous load. That mistake is costly. Test the system with the actual hose length, filter, valve, and lifting surface. Inspect the filter for dust buildup, then check for leaks around seals and fittings. A small leak can mimic pump failure.

Temperature also matters. Measure motor heat after several operating cycles, not just during startup. Verify electrical voltage, current protection, and rotation direction before installation. Review the manufacturer’s service limits and available spare parts. I would also question whether the original pump was oversized; matching its capacity exactly is not always necessary. In some applications, a slightly lower flow rate improves reliability, but only after measured lifting requirements confirm it. Replacement decisions should rely on recorded test results, not appearance or habit.

Prepare Safety Measures, Tools, and Compatible Replacement Parts

Replacing a heavy-duty lift vacuum pump begins with controlled preparation. I always disconnect electrical power and apply a clear lockout label before touching the assembly. Lower the lift completely, support it mechanically, and release trapped vacuum pressure. Never rely on hydraulic or vacuum pressure alone. Wear safety glasses, cut-resistant gloves, and protective footwear. Keep the work area dry and free from oil spills.

Prepare a socket set, torque wrench, insulated screwdrivers, hose clamps, a multimeter, and clean lint-free cloths. Photograph hose routing and wire positions before removal. Small details matter. Inspect connectors for heat damage, cracked insulation, and loose terminals. I have learned that rushed photographs can create confusion later, especially when similar hoses cross each other. Mark each connection with removable labels, but check them twice.

The replacement pump must match the required voltage, airflow, vacuum rating, duty cycle, mounting pattern, port size, and rotation direction. Compare the old pump’s specifications with the equipment service manual, not appearance alone. Confirm seal materials and hose compatibility with the system fluid and operating temperature. Use new seals when recommended, and avoid forcing mismatched fittings. After installation, tighten fasteners to the specified torque and secure every hose clamp. Test the pump briefly, then inspect for leaks, unusual vibration, overheating, or slow lift movement. Stop immediately if pressure behaves unexpectedly. A second inspection is worth the extra minutes.

Remove the Heavy-Duty Lift Vacuum Pump Step by Step

7 Best Ways to Replace a Heavy Duty Lift Vacuum Pump?

Remove the Heavy-Duty Lift Vacuum Pump Step by Step

Start with the load, not the pump. Lower the lifting frame onto a rated support, then confirm it cannot move. OSHA’s 2022 workplace report recorded 5,486 fatal work injuries in the United States, so stored energy deserves attention. Shut off electrical and pneumatic supplies. Apply lockout and tagout procedures. Release trapped vacuum slowly, using a gauge rather than guessing. A quiet hose can still hold dangerous pressure.

Mark each hose before removal. Take clear photographs of fittings, clamps, and cable positions. Disconnect the electrical leads only after testing for zero voltage. Cap open ports immediately; dust can damage a replacement pump before startup. Remove mounting bolts evenly, then support the pump with a rated lifting aid. Heavy components often shift at the final bolt. That moment is easy to underestimate.

Inspect the base for cracks, stretched bolts, oil residue, and damaged isolation pads. The U.S. Department of Energy reports that compressed-air systems may lose 20–30% of output through leaks, a useful warning for vacuum lines too. Replace brittle hoses and questionable seals instead of reusing them automatically. I have seen clean-looking fittings leak after reassembly. That assumption costs time. Keep a removal record, including pump orientation and measured vacuum readings. The record may reveal whether the old pump failed or the system itself needs correction.

Install and Secure the New Vacuum Pump Correctly

Replacing a heavy duty lift vacuum pump requires more than removing the old unit. Shut down the lift and isolate every energy source before work begins. Confirm the replacement pump matches the required vacuum level, flow rate, voltage, and mounting pattern. Measure twice.

Clean the mounting surface and remove oil, dust, and damaged gasket material. Position the pump without forcing the shaft or fittings into alignment. Use suitable vibration isolators where required. Tighten the mounting bolts evenly in a cross pattern, then apply the specified torque. Do not guess on torque values. Check the service manual or equipment records.

Connect hoses with smooth bends and secure clamps near each fitting. A loose hose can create a small leak that looks like pump failure. Check electrical terminals for firm contact, correct grounding, and protected cable routing. Add or replace fluid only when the pump design requires it. Too much fluid can be harmful.

Before full operation, turn the pump manually if the design permits. Inspect for rubbing, unusual resistance, or loose hardware. Start the system briefly and watch the vacuum gauge, motor sound, and vibration. Stop immediately if the reading falls or the pump overheats. My common mistake was trusting a quiet motor while ignoring a cracked hose. Recheck all connections after several lifting cycles and record the final vacuum reading for future maintenance.

Test Vacuum Performance and Inspect for Operating Problems

Replacing a heavy-duty lift vacuum pump should begin with evidence, not guesswork. Test vacuum performance under a known load and record ultimate pressure, pump-down time, and operating temperature. ISO 21360-1:2012 recommends standardized methods for measuring vacuum-pump throughput and pressure. Use a calibrated gauge near the lift circuit. Readings taken far from the pump can hide restrictions.

Seven checks reveal most replacement needs: isolate the pump, test blank-off pressure, inspect hoses, examine seals, clean filters, check oil condition, and compare motor current. Listen for uneven knocking. Feel for abnormal vibration. A hot casing deserves attention. A perfect gauge reading can still mislead when the valve leaks. I learned that the hard way during a rushed maintenance inspection.

Leak testing deserves patience. The U.S. Department of Energy reports that compressed-air leaks may waste 20–30% of compressor output; vacuum systems face a comparable energy penalty when leaks force longer cycles (DOE, Improving Compressed Air System Performance, 3rd ed.). This figure is not a vacuum-specific measurement, but it shows why leak control matters. Apply a controlled vacuum, isolate sections, and watch pressure decay for several minutes. If pressure falls quickly, inspect fittings and lifting pads before blaming the pump. Match the replacement to required flow, pressure range, duty cycle, and motor load. Bigger is not always better. A smaller, correctly matched pump may run cooler and last longer.

7 Best Ways to Replace a Heavy-Duty Lift Vacuum Pump

Vacuum performance test and operating-problem inspection under identical load conditions.

Representative test values for a 60-liter sealed vessel at 20–25°C. Lower ultimate pressure and shorter evacuation time indicate better pump performance. A high inlet restriction or worn pump can prevent the system from reaching the expected vacuum level.

FAQS

How can I identify the correct replacement vacuum pump?

Identify the existing pump type, such as rotary vane, diaphragm, liquid ring, or dry-running. Record vacuum level, airflow, motor power, shaft speed, port size, mounting pattern, and duty cycle. Measure the inlet connection with calipers. Check whether the system uses oil, water, or dry operation. Do not guess from appearance.

What information should be recorded before removing the old pump?

Photograph hose routing and wire positions before disassembly. Record nameplate voltage, current, rotation direction, and connection details. Mark similar hoses with removable labels. Check those labels twice. Loose notes can cause installation errors later.

What safety steps are required before replacement?

Disconnect electrical power and apply a clear lockout label. Lower the lift completely and support it mechanically. Release trapped vacuum pressure before opening connections. Never rely on hydraulic or vacuum pressure alone. Wear safety glasses, cut-resistant gloves, and protective footwear.

Which tools are useful during vacuum pump replacement?

Prepare sockets, a torque wrench, insulated screwdrivers, hose clamps, and a multimeter. Keep clean, lint-free cloths nearby. Inspect connectors for heat damage, cracked insulation, and loose terminals. Keep the work area dry and free from oil spills. Small details matter.

How should compatibility be checked before installation?

Compare voltage, airflow, vacuum rating, duty cycle, mounting pattern, port size, and rotation direction. Check seal materials against the system fluid and operating temperature. Confirm hose compatibility before forcing any fitting. Use new seals when recommended. A similar-looking pump may perform poorly.

How can I tell whether the pump or the system has a leak?

Test the system with the actual hose length, filter, valve, and lifting surface. Apply controlled vacuum and isolate sections one at a time. Watch pressure decay for several minutes. Inspect fittings, seals, valves, hoses, and lifting pads. Small leaks matter. A perfect gauge reading can still mislead.

What performance tests should be completed after replacement?

Test under a known load and record ultimate pressure, pump-down time, and operating temperature. Use a calibrated gauge near the lift circuit. Compare motor current with expected operating values. Inspect for slow lifting, unusual vibration, uneven knocking, or overheating. Test under load.

Is a larger replacement pump always better?

No. A larger pump may increase energy use, heat, and mechanical stress. A slightly lower flow rate can improve reliability when lifting requirements support it. Measure actual lifting performance before reducing capacity. Matching the original pump exactly is not always necessary. I would question old assumptions.

Conclusion

Replacing a heavy-duty lift vacuum pump requires careful planning, correct identification, and a methodical approach. How to replace the vacuum pump in a heavy-duty lift? First, determine the existing pump type, capacity, mounting arrangement, power requirements, hose connections, and operating vacuum range. Prepare suitable tools, protective equipment, replacement seals, fittings, and a compatible pump. Before starting, park the lift securely, isolate all power sources, release stored vacuum or pressure, and keep the work area clean.

Remove the old pump by labeling connections, disconnecting hoses and wiring, and unfastening its mounting hardware without damaging nearby components. Install the new pump in the correct orientation, secure it firmly, and reconnect every line and electrical connection according to the equipment specifications. Check for loose fittings, worn hoses, leaks, and improper alignment. Finally, restore power and test the lift under controlled conditions. Monitor vacuum level, operating noise, response time, and cycling performance, then stop immediately if unusual vibration, overheating, air leakage, or unstable lifting occurs.

Liam

Liam

Liam is a dedicated marketing professional with a profound expertise in the industry, where he excels at highlighting the unique advantages of our core products. With a keen understanding of market trends and consumer needs, Liam frequently updates our company’s professional blog, providing......